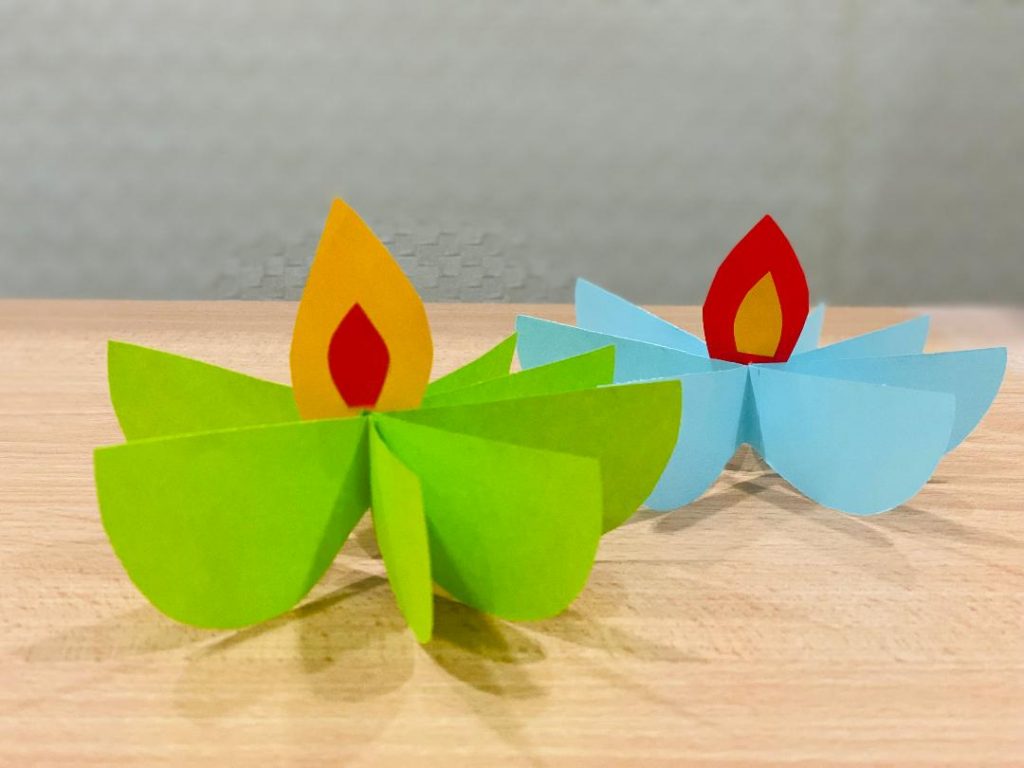
Posted inDeepavali Festive Crafts Paper Crafts DIY Diwali Paper Diya Posted by By Merryn September 12, 2022Deepavali is a Sanskrit vocabulary meaning a 'line of lamps'. It is one of the…
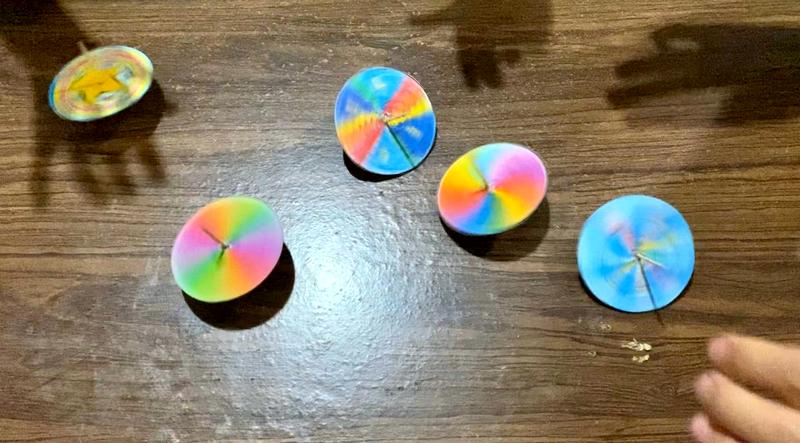
Posted inPaper Crafts DIY Spinning Paper Top Posted by By Merryn April 22, 2021Today's craft is an extremely easy paper spinning top. All we need are: a hardboard…
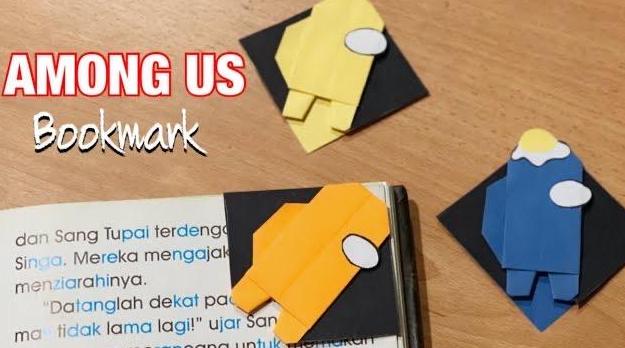
Posted inBookmark Origami Paper Crafts AMONG US Origami Bookmark Posted by By Merryn March 9, 2021The children are back at school and with that, they'll need bookmarks for their studies.…
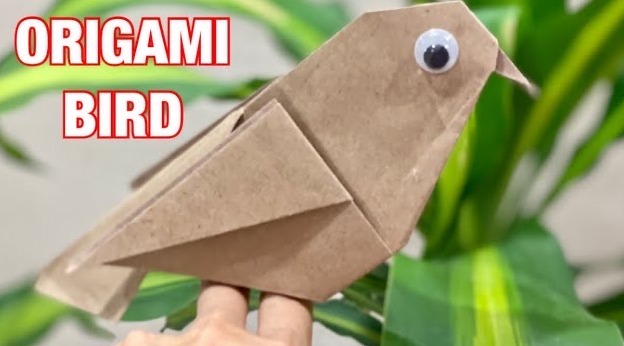
Posted inAnimal Crafts Bird Paper Crafts Origami Bird Posted by By Merryn February 28, 2021Let's make an origami bird today. This bird can perch on your fingers or literally…
Posted inPaper Crafts AMONG US | IMPOSTER Paper Toy Craft Posted by By Merryn February 27, 2021I'm not a gamer hence I have no idea what AMONG US is all about.…
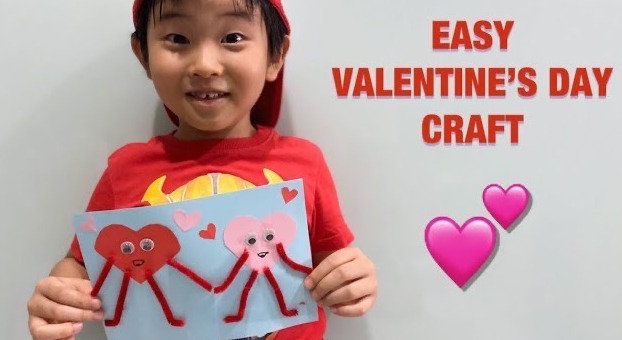
Posted inPaper Crafts Valentine's Day Easy Valentine’s Day Heart Craft Idea Posted by By Merryn February 12, 2021Valentine's Day is just a couple of days away. Let's get our kids to celebrate…
Posted inChinese New Year Festive Crafts Paper Crafts 30 DIY Chinese New Year Angpow Decor Ideas Posted by By Merryn January 19, 2021We will be celebrating Chinese New Year of the OX in 2021. It may be…
Posted inHand and Footprint Art Paper Crafts Footprint Craft : Paper Popsicle Posted by By Merryn June 30, 2016Today's footprint craft is a remake of our footprint popsicle we did back in 2011…
Posted inFood craft Paper Crafts YouTube tutorial Video Tutorial: Torn Paper Apple Art Posted by By Merryn April 19, 2016We are starting something new. We'll be making and sharing videos of the kids crafting.…
Posted inAnimal Crafts Chinese New Year Festive Crafts Monkey Origami Paper Crafts Angpow Origami Monkey Posted by By Merryn January 8, 2016Chinese New Year is just a month away and we will be welcoming the Fire…
Posted inAnimal Crafts Paper Crafts Paper Plate Crafts Penguin Paper Plate Penguin Posted by By Merryn August 19, 2014It has been quite some time since we last made a paper plate craft hasn't…
Posted inAnimal Crafts Bird Butterfly Craft from Recycled Materials Insect crafts Paper Crafts Party Craft Balancing Butterfly Craft Posted by By Merryn June 6, 2014This is a really fun craft that doesnt require any fancy materials. You’ll most likely…
Posted inAnimal Crafts Origami Paper Crafts Whale Origami Whale Posted by By Merryn June 1, 2014It's the school holidays now so let's make an origami whale. OK so it's the…
Posted inCrafts by Materials Hand and Footprint Art Paper Crafts Masquerade Mask Posted by By Merryn April 29, 2013Today we will be making a face mask or rather an eye mask from colored…
Posted inHalloween Paper Crafts Halloween Paper Pumpkin Posted by By Merryn October 30, 2012Halloween is fast approaching and we hope it's not to late to share this creation,…
Posted inAnimal Crafts Cat Festive Crafts Halloween Paper Crafts DIY Halloween Trick or Treat Bag Posted by By Merryn October 16, 2012Halloween is just around the corner. Let's start preparing for 'Trick or Treat'. We don't…
Posted inAnimal Crafts Craft from Recycled Materials Paper Crafts Paper Mache Snake Papier Mache Hook Posted by By Merryn September 25, 2012It's been some time since our last papier mache project so let's make one today.…
Posted inAnimal Crafts Bookmark Butterfly Insect crafts Paper Crafts Pencil Topper Posted by By Merryn June 12, 2012During the school holidays, I brought our little crafty boy to the mall for some…
Posted inAnimal Crafts Crafts by Materials Crepe Paper Food craft Paper Crafts Simple Paper Twisting Project Posted by By Merryn March 5, 2012We did a simple paper twisting project today. Paper Twist Apple All we need are…
Posted inCorrugated Paper Craft from Recycled Materials Paper Crafts Textured Space Art Posted by By Merryn February 20, 2012My boy loves the outer space. He found this picture online the other day. He…
Posted inCrafts by Materials Crepe Paper Festive Crafts Paper Crafts Shapes Valentine's Day Valentine's Day Crafts Puffy Heart Valentine Posted by By Merryn February 7, 2012Valentine's Day is around the corner. Let's make a puffy heart today <3 Valentine's Puffy…
Posted inChinese New Year Festive Crafts Paper Crafts Print Art DIY Ang Pow Packet Posted by By Merryn January 30, 2012I was a pre-school teacher when I was expecting my little artist Ethan. It was…
Posted inAnimal Crafts Paper Crafts Jelly Fish craft Posted by By Merryn August 13, 2011He came home from his Mandarin class the other day with this jellyfish craft. It…
Posted inBottles Craft from Recycled Materials Paper Crafts Papier Mache Vehicle Paper Mache Aeroplane Posted by By Merryn June 15, 2011We are very excited today. We did a paper mache aeroplane! We can now build…
Posted inAnimal Crafts Bird Origami Paper Crafts Origami cranes for Japan Posted by By Merryn April 21, 2011We were in Sunway Giza this evening and saw this.. Let's fold origami cranes for…
Posted inPaper Crafts Shapes Vehicle Basic Shapes Dump Truck Posted by By Merryn February 17, 2011Let's learn basic shapes today and along the way make a dump truck out of…
Posted inFestive Crafts Paper Crafts Shapes Valentine's Day Valentine’s Heart Mobile Posted by By Merryn February 9, 2011Let's make a super simple heart mobile today :) Valentine's Heart Mobile Refer to our…
Posted inFestive Crafts Paper Crafts Shapes Valentine's Day Valentine’s Heart Stand Posted by By Merryn February 9, 2011Valentine's Day is just around the corner. Let's make a lovely heart stand today :D…
Posted inAnimal Crafts Easter Festive Crafts Hand and Footprint Art Paper Crafts Rooster Hand and footprint Chicken Posted by By Merryn January 21, 2011Oh Mac Donald had a farm, E-I-E-I-O, And on his farm he has some chickens,…
Posted inAnimal Crafts Chinese New Year Festive Crafts Fish Paper Crafts Gold Packet Gold Fish Posted by By Merryn January 17, 2011This Chinese New Year, let's have beautiful goldfish accompanying us :D We'll need only 6…
Posted inChinese New Year Festive Crafts Paper Crafts Shapes Red Packet Lucky Star Lantern Posted by By Merryn January 15, 2011We are going to make a Star out of red packets today :D Red Packet…
Posted inAnimal Crafts Origami Paper Crafts Snake Origami Snake Posted by By Merryn January 14, 2011Let's make a snake today :D
Posted inChinese New Year Festive Crafts Paper Crafts Chinese Paper Cut – SPRING Posted by By Merryn January 5, 2011Chinese New Year is around the corner so let's do some paper cuts today. Let's…
Posted inCraft Foam Craft from Recycled Materials Crafts by Materials Paper Crafts Paper Cup Flower Posted by By Merryn October 4, 2010When we go out shopping, we like to sample food given by the promoters and…
Posted inPaper Crafts YouTube tutorial How To Cut Letters from Papers Posted by By Merryn September 22, 2010I found this on YouTube the other day and thought that it is extremely awesome!…