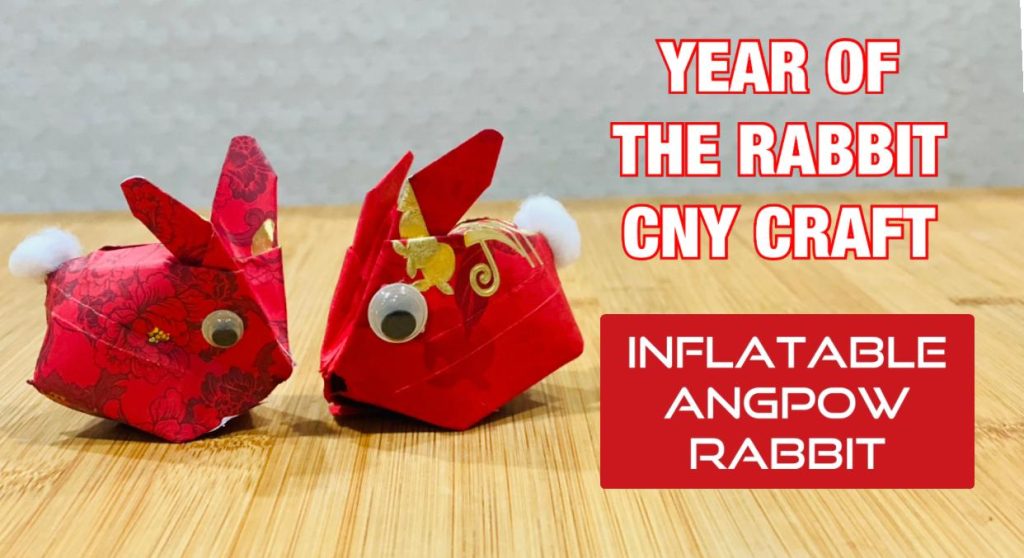
Posted inChinese New Year Rabbit 10 Super Simple DIY Angpao Rabbit Craft for Chinese New Year Posted by By Merryn September 23, 2022We will be welcoming the Year of the Rabbit on January 22, 2023. The rabbit is the…
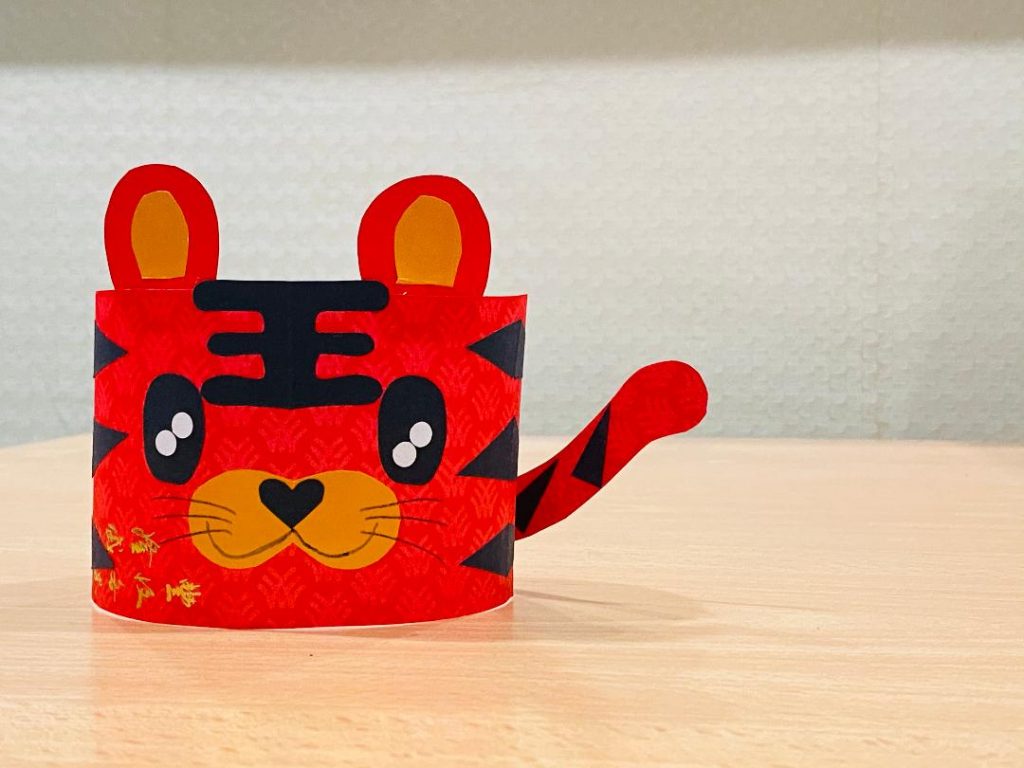
Posted inTiger Easy Angpow TIGER craft for Chinese New Year of the TIGER Posted by By Merryn January 5, 2022In less than a month, we will be welcoming the Year of the TIGER. Here's…
Posted inAnimal Crafts Chinese New Year Tiger DIY Chinese New Year Red Packet Decor | Year of the TIGER Easy Angpow Decor Posted by By Merryn December 8, 2021Here's another TIGER angpow creation for the upcoming Chinese New Year. This is a simple…
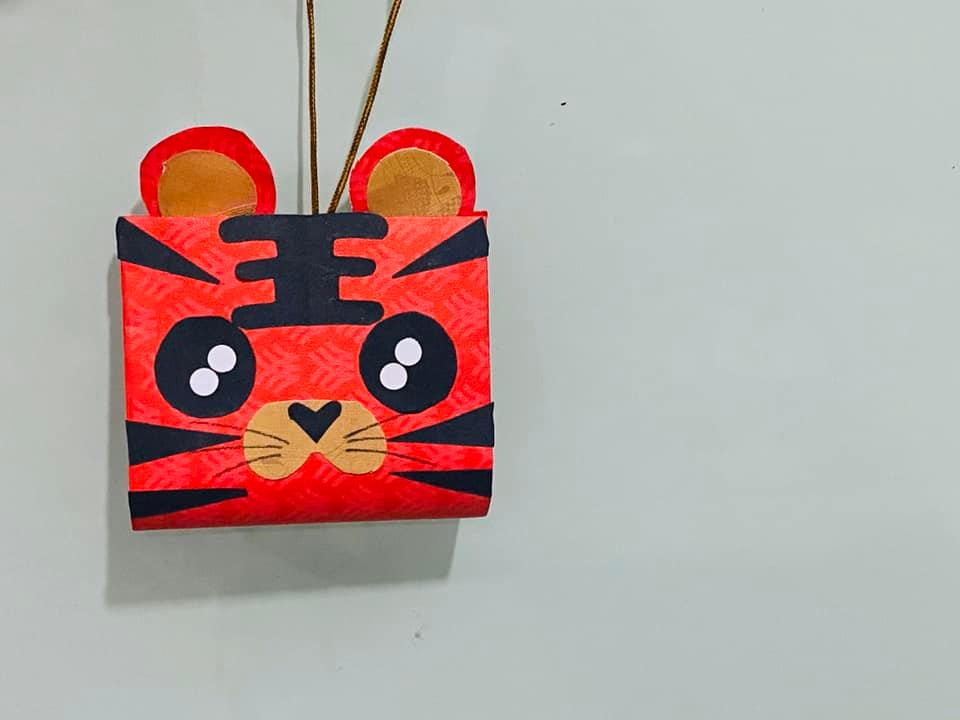
Posted inAnimal Crafts Chinese New Year Tiger DIY Chinese New Year Red Packet Decor | Year of the TIGER Angpow Decor | My Original Creation Posted by By Merryn November 27, 2021Here's another Chinese New Year Tiger red packet decor tutorial. These cute little tiger ornament…
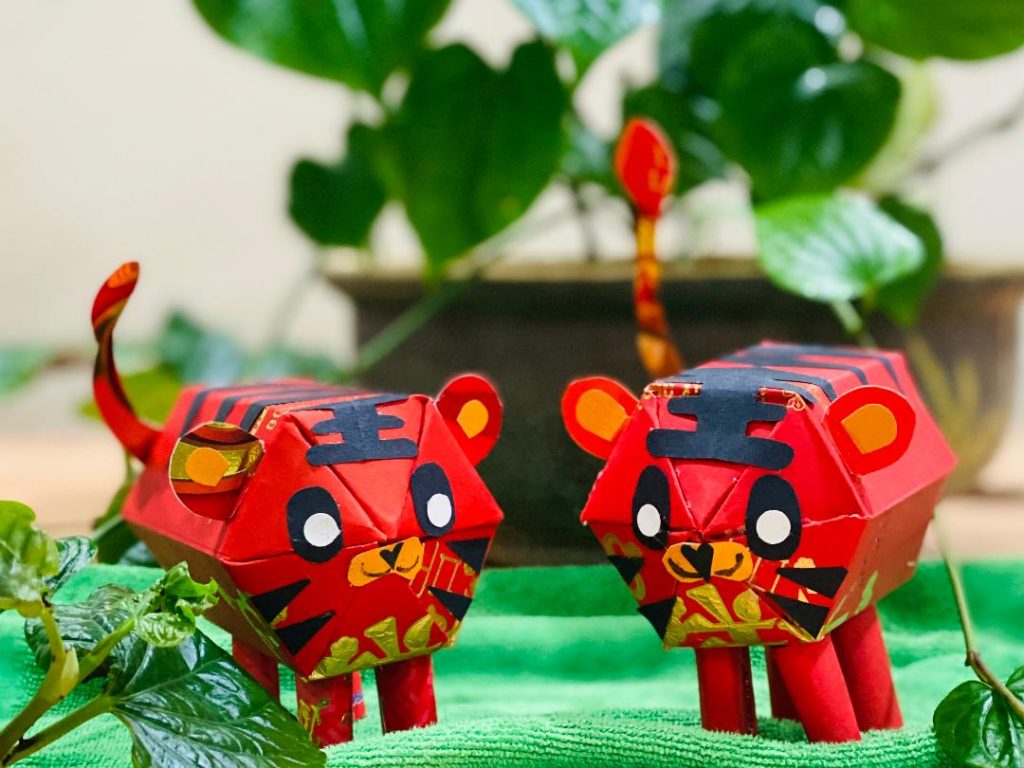
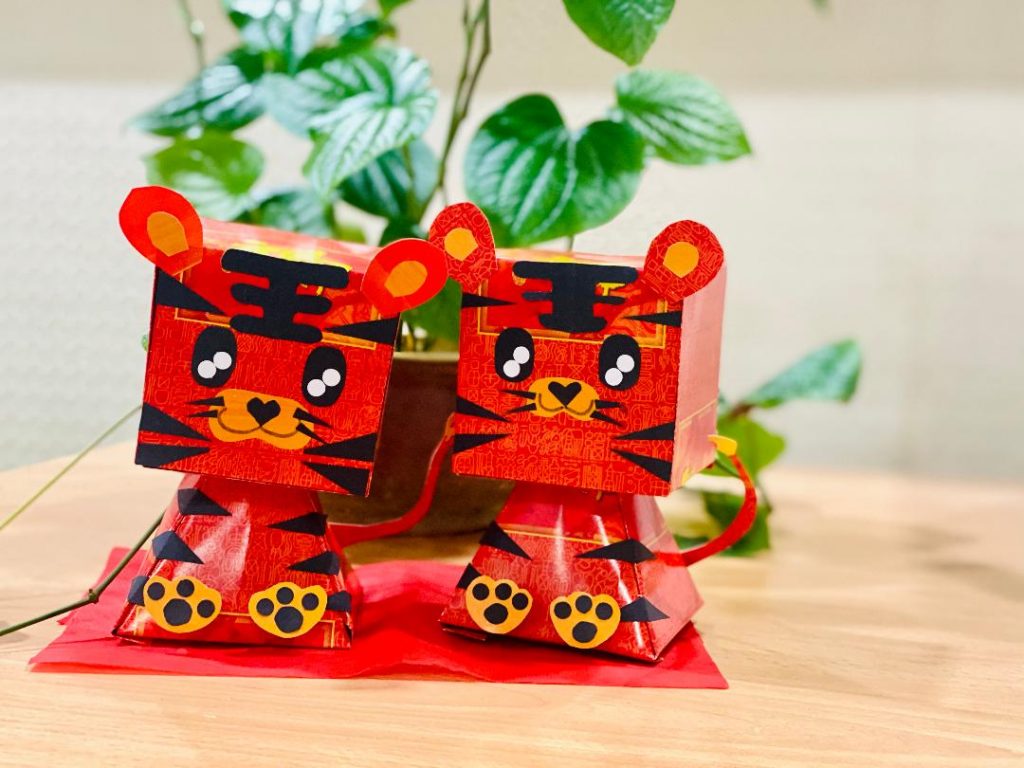
Posted inTiger DIY Chinese New Year Red Packet Decor | Year of the TIGER Table Top Angpow Decor Posted by By Merryn November 20, 2021We will be welcoming the Year of the TIGER this Chinese New Year. It is…
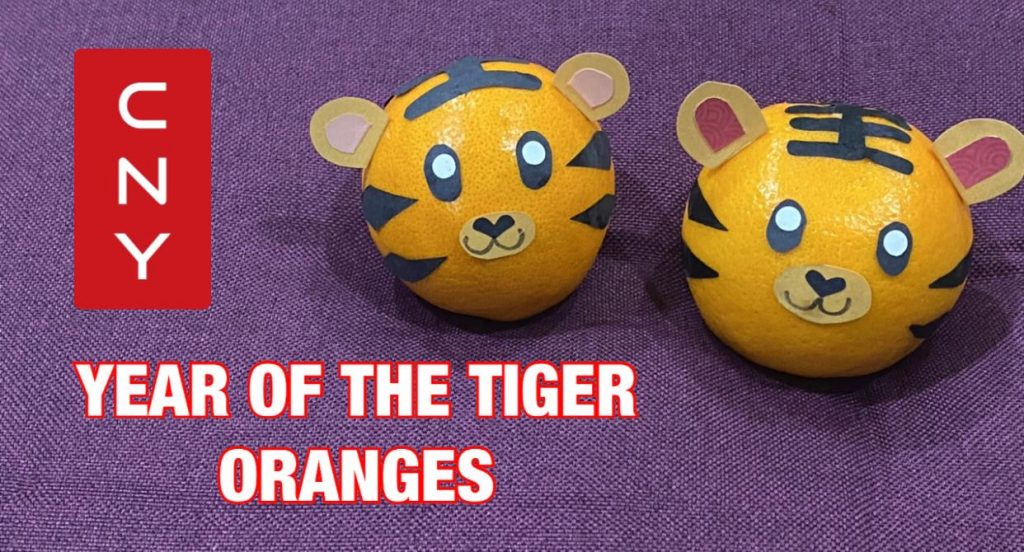
Posted inAnimal Crafts Chinese New Year Chinese New Year DIY | Year of the TIGER Orange decoration Posted by By Merryn October 29, 2021Oranges and other citrus fruit - kumquats, tangerines and pomelo are common Chinese New Year…
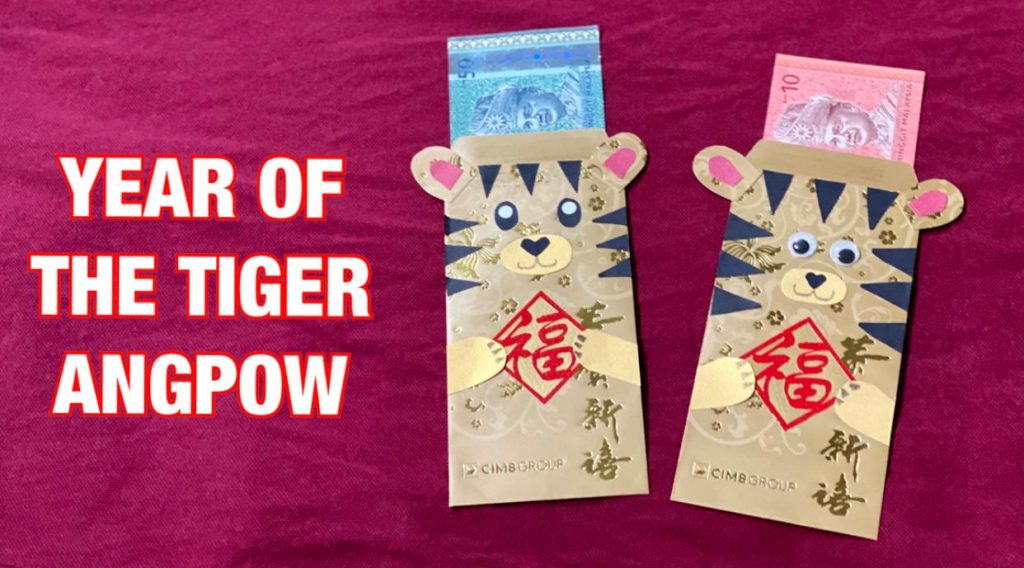
Posted inAnimal Crafts Chinese New Year DIY | Year of the TIGER money packet Posted by By Merryn October 28, 2021In just 3 months' time we'll be welcoming the Chinese New Year of the TIGER.…
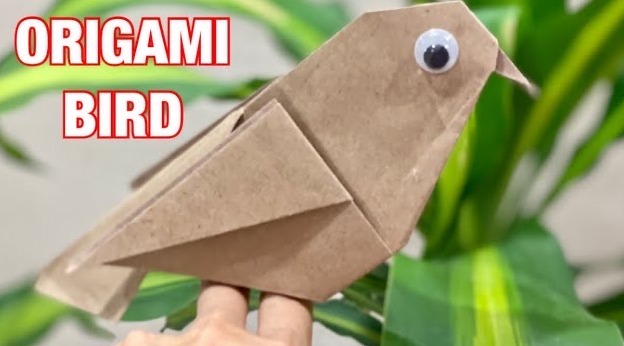
Posted inAnimal Crafts Bird Paper Crafts Origami Bird Posted by By Merryn February 28, 2021Let's make an origami bird today. This bird can perch on your fingers or literally…
Posted inAnimal Crafts Craft from Recycled Materials Octopus Toilet Paper Roll Toilet Paper Roll Octopus Craft Posted by By Merryn November 17, 2016We first did this toilet paper roll octopus back in 2010 with the elder brother.…
Posted inAnimal Crafts Fish Sponge Painting – Koi Fish Posted by By Merryn November 1, 2016We did this sponge artwork with the elder brother back in 2012. Back then we…
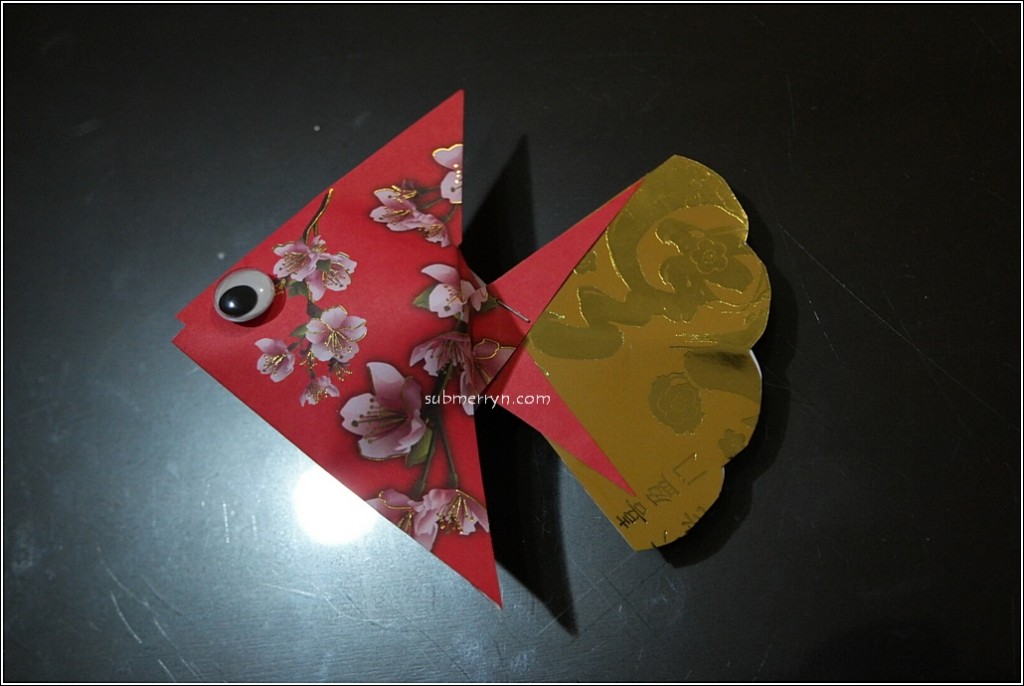
Posted inAnimal Crafts Chinese New Year Festive Crafts Fish Chinese New Year Ang Pow Fish Posted by By Merryn February 3, 2016Remember our Ang Pow Fish decor we made back in 2010? Well, we improved it…
Posted inAnimal Crafts Chinese New Year Festive Crafts Monkey Origami Paper Crafts Angpow Origami Monkey Posted by By Merryn January 8, 2016Chinese New Year is just a month away and we will be welcoming the Fire…
Posted inPaper Plate Crafts Shark Paper Plate Shark Posted by By Merryn August 27, 2014We came across a nice paper plate shark craft by Cindy and her son Trevor from…
Posted inAnimal Crafts Paper Crafts Paper Plate Crafts Penguin Paper Plate Penguin Posted by By Merryn August 19, 2014It has been quite some time since we last made a paper plate craft hasn't…
Posted inAnimal Crafts Bird Butterfly Craft from Recycled Materials Insect crafts Paper Crafts Party Craft Balancing Butterfly Craft Posted by By Merryn June 6, 2014This is a really fun craft that doesnt require any fancy materials. You’ll most likely…
Posted inAnimal Crafts Origami Paper Crafts Whale Origami Whale Posted by By Merryn June 1, 2014It's the school holidays now so let's make an origami whale. OK so it's the…
Posted inAnimal Crafts Hand and Footprint Art Toe Print Caterpillar Posted by By Merryn September 18, 2013Sorry for the long hiatus. I've just delivered to a cute baby boy and on…
Posted inAnimal Crafts Bird Craft from Recycled Materials Dried Leaf Chick Posted by By Merryn April 21, 2013We were walking in the park when we noticed lots of dried leaves scattered around.…
Posted inAnimal Crafts Craft from Recycled Materials Egg Carton Snake Egg carton snake Posted by By Merryn February 6, 2013Chinese New Year is approaching fast and we are ready to welcome the year of…
Posted inAnimal Crafts Cat Festive Crafts Halloween Paper Crafts DIY Halloween Trick or Treat Bag Posted by By Merryn October 16, 2012Halloween is just around the corner. Let's start preparing for 'Trick or Treat'. We don't…
Posted inAnimal Crafts Craft from Recycled Materials Paper Crafts Paper Mache Snake Papier Mache Hook Posted by By Merryn September 25, 2012It's been some time since our last papier mache project so let's make one today.…
Posted inAnimal Crafts Dog Cookies for Kids Posted by By Merryn August 15, 2012Besides crafting, we can also bake cute stuffs for kids. With just flour, icing sugar…
Posted inAnimal Crafts Bird Egg Carton Hand and Footprint Art Egg Carton Handprint Owl Posted by By Merryn August 13, 2012Howdy craftiers! Sorry for the long absence. It's been some time now since our last…
Posted inAnimal Crafts Chinese New Year Fish Koi fish painting for kids Posted by By Merryn July 8, 2012The kids painted koi fish today in the Studio. It's super easy even a toddler…
Posted inAnimal Crafts Bookmark Butterfly Insect crafts Paper Crafts Pencil Topper Posted by By Merryn June 12, 2012During the school holidays, I brought our little crafty boy to the mall for some…
Posted inAnimal Crafts Crafts by Materials Crafty Crafted Friends Easter Felt Festive Crafts Rabbit Felt Bunny Posted by By Merryn May 14, 2012Michael Ann of Michael Ann Made shared with us this cute little bunny felt craft. This…
Posted inAnimal Crafts Bee Craft from Recycled Materials Crafts by Materials Crepe Paper Mother's Day Toilet Paper Roll Crepe Paper Pencil Holder Posted by By Merryn April 29, 2012I've always loved the fine art of pottery. I wish to try pottery with the…
Posted inAnimal Crafts Cotton Crafts by Materials Easter Festive Crafts Lamb Easter Lamb craft Posted by By Merryn April 6, 2012It's Good Friday today. Are you done decorating your eggs for Easter? Inspired by DisneyFamilyFun,…
Posted inAnimal Crafts Crafts by Materials Crepe Paper Food craft Paper Crafts Simple Paper Twisting Project Posted by By Merryn March 5, 2012We did a simple paper twisting project today. Paper Twist Apple All we need are…
Posted inAnimal Crafts Chinese New Year Festive Crafts Fridge Magnets Fridge Magnet : Dragon Posted by By Merryn January 16, 2012Let's make a Dragon art today :) Dragon fridge magnet. Super simple and a fun…
Posted inAlphabets Animal Crafts Teaching Aid Zebra Z for Zebra Posted by By Merryn January 6, 2012I remembered my niece once shared with us a naughty little joke. She asked, "What…
Posted inAnimal Crafts Pyssla Beads Pyssla Bead : Happy Feet Posted by By Merryn December 27, 2011We were shopping when he came across this penguin and took the feet away! >_<…
Posted inBird Pyssla Beads Yellow Angry Bird Pyssla Beads Posted by By Merryn November 23, 2011Still in the mood for Pyssla Beads. Here's a Yellow Angry Bird :D Yellow Angry…
Posted inAnimal Crafts Bird Craft from Recycled Materials Easter Toilet Paper Roll Toilet Paper Roll Bird Posted by By Merryn November 1, 2011Let's make a bird today. Not an angry bird but a cute one :D Toilet…
Posted inAnimal Crafts Bat Craft from Recycled Materials Festive Crafts Halloween Party Craft Toilet Paper Roll Toilet Paper Roll Halloween Bat Posted by By Merryn October 18, 2011Halloween is around the corner and it's time to make some creepy crafts :D Toilet…